Tile adhesive slipping on vertical walls often leads installers to blame the adhesive immediately. That reaction can trigger rushed water adjustments, product changes, and costly disputes while the real cause remains active. I recommend treating downward tile movement as a system problem and checking preparation, timing, substrate, tile, and application variables in a fixed order.
Tile adhesive slipping occurs when the installed tile moves downward before the adhesive develops enough resistance to hold it in position.1 The adhesive may contribute, but slippage alone does not prove a product defect2. Installers should stop broader installation and verify water dosage, mixing, working time, substrate condition, tile characteristics, bed thickness, and trowel technique.
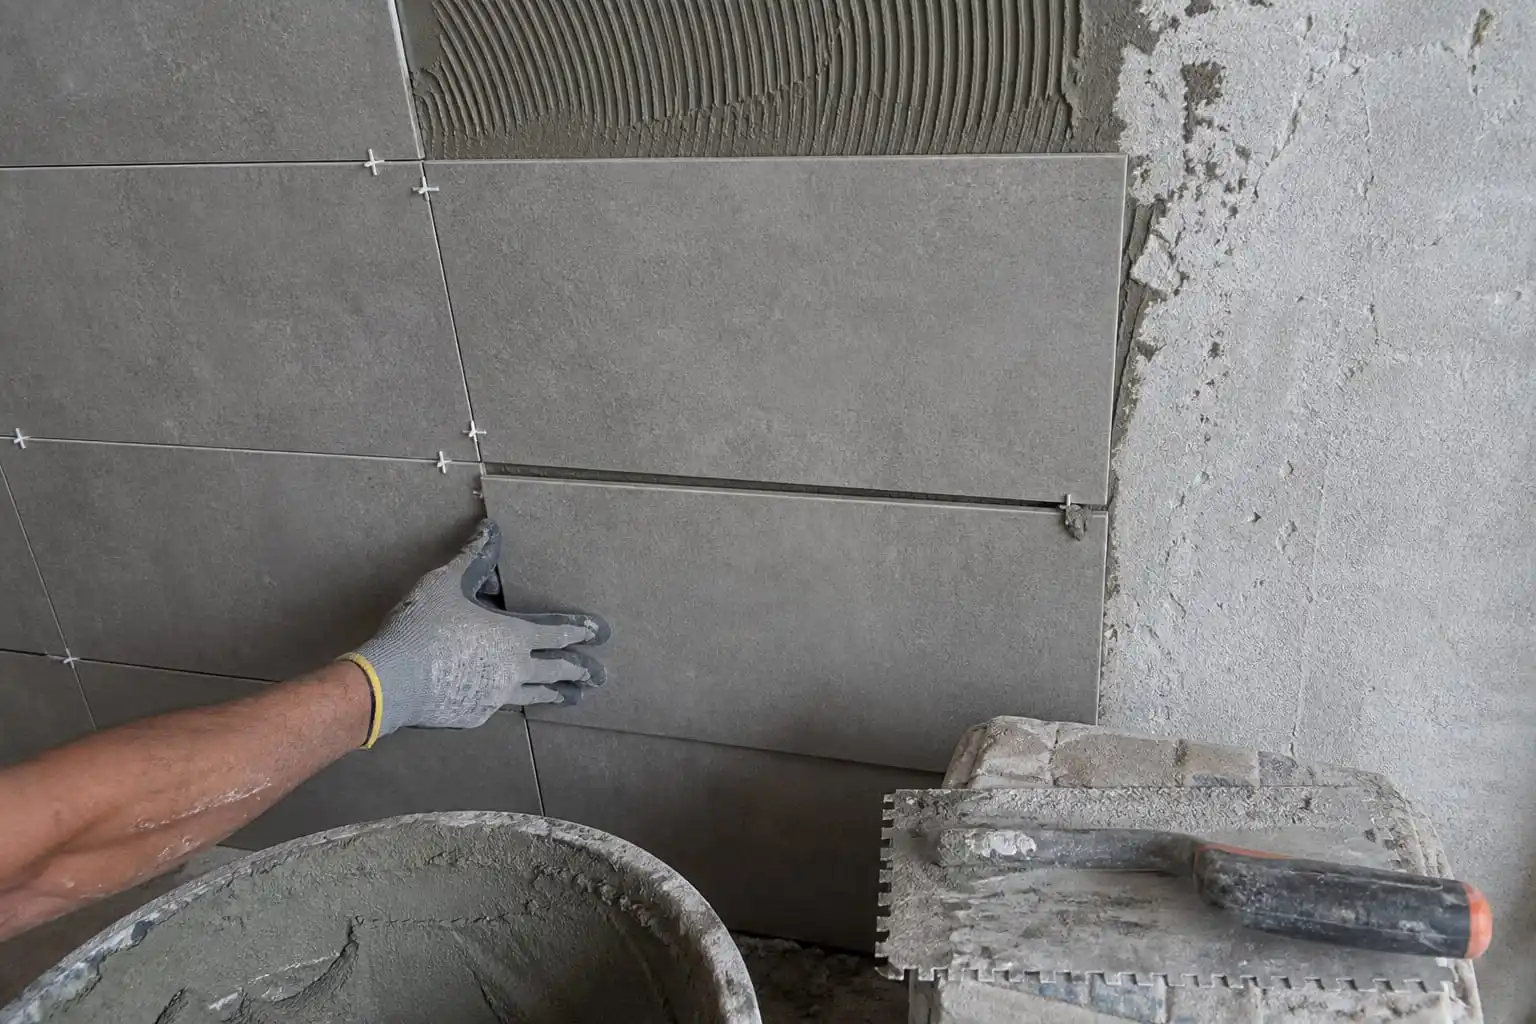
This article focuses only on downward movement after tiles are placed. I cover other tile adhesive problems separately in the linked troubleshooting guide. Here, I will show how I structure the questions when contractors, distributors, or property owners report that tiles will not remain aligned on a wall.
Why Does Tile Adhesive Slipping Require a System Diagnosis?
Tile adhesive slipping can appear simple because the symptom is visible: a tile moves downward after placement. However, that visible movement does not identify its cause. If a contractor replaces the adhesive without checking the whole installation process, the same problem may continue with the replacement product.
I treat tile slippage as a system-diagnosis problem because vertical stability depends on the prepared adhesive, its working condition, the substrate, the tile, the applied bed, the tools, and the environment. A disciplined investigation separates these variables before anyone concludes that the adhesive is defective or unsuitable.
Slippage Is a Symptom, Not a Root-Cause Test
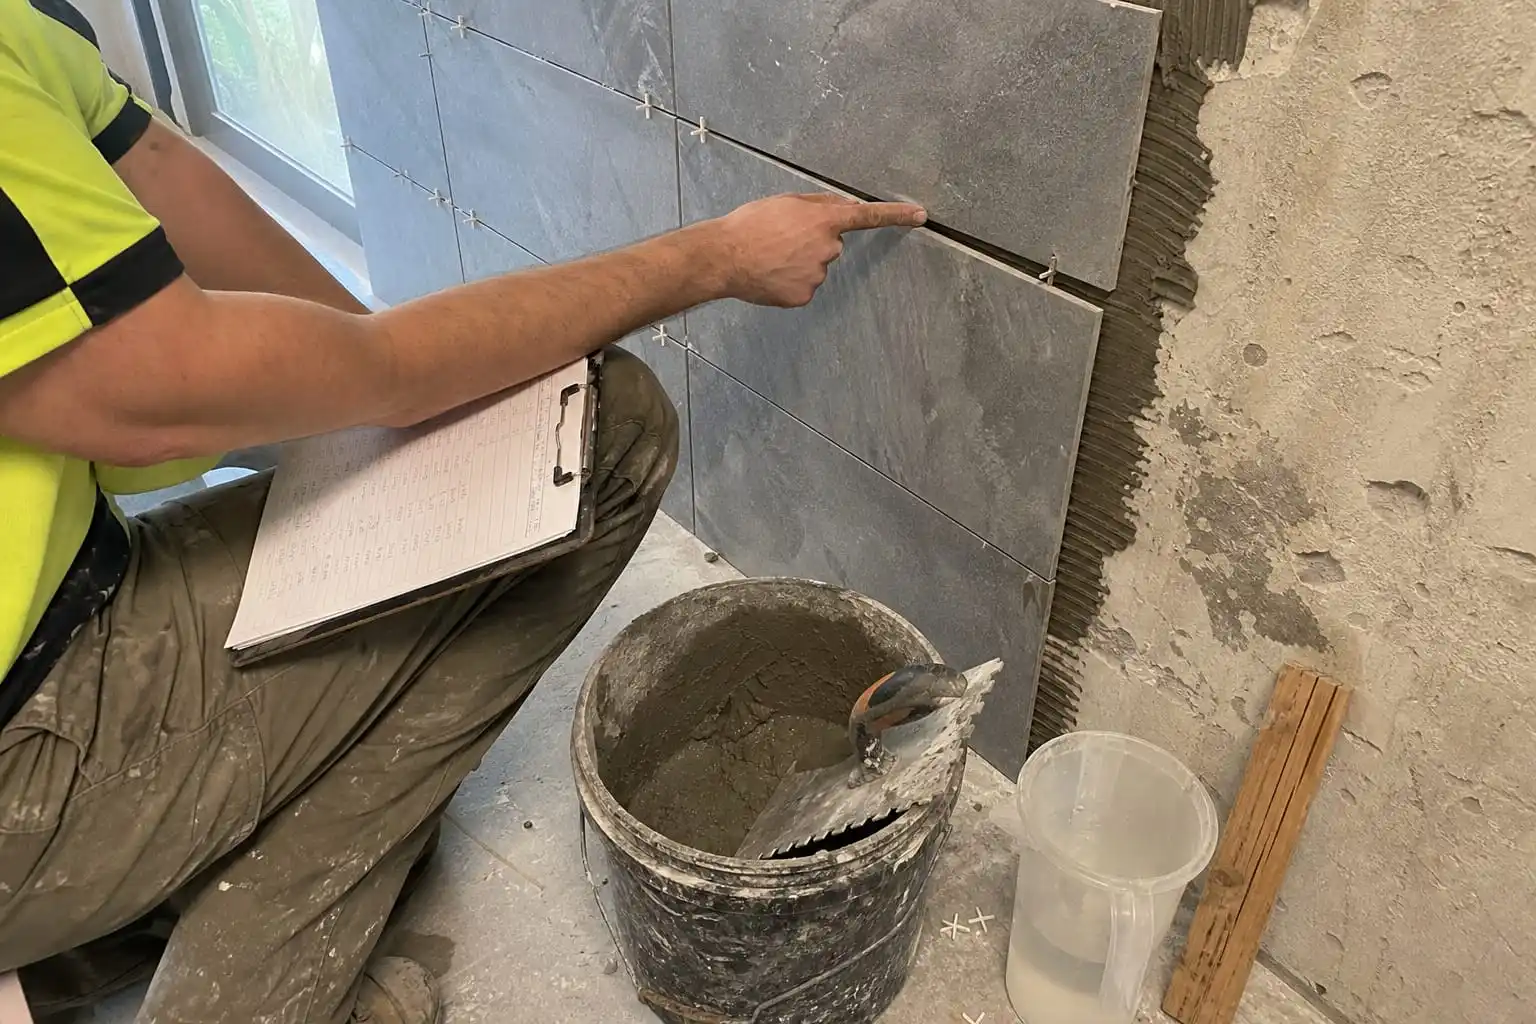
I have handled repeated inquiries in which the first message was simply, “The tiles are sliding, so the adhesive quality must be poor.” That conclusion may be understandable, but it skips several important questions.
I usually start by asking:
- Did the installer measure the mixing water?
- Did the installer follow the required mixing, slaking, and remixing sequence?
- How long had the material remained in the bucket?
- How long had the adhesive remained exposed on the wall?
- Was extra water added after the mix began to stiffen?
- What were the tile dimensions, weight, and back profile?
- What substrate received the adhesive?
- What trowel and applied bed thickness did the installer use?
- Were temporary supports or spacers required by the installation method?
- What were the temperature, wind, and surface conditions?
Each question follows a different failure path. A mix that contains excess water is not the same as a correctly mixed adhesive left open on a hot wall. A heavy tile installed over an uneven substrate also presents a different problem from a normal tile placed into a bed that has already formed a surface skin.
The Variables Interact
The variables can also reinforce one another. For example, an uneven wall may encourage the installer to apply a deeper adhesive bed. A deeper bed may allow more movement under tile weight.3 The installer may then make the next batch thicker by reducing water, even though that change could reduce wetting or workability.
I use the following table to prevent premature conclusions:
| Observed condition | Possible contribution to slipping | What I would verify |
|---|---|---|
| The mix appears very fluid | The water dosage or mixing sequence may be incorrect | I would compare weighed or measured water with the current product data sheet |
| The mix stiffens in the bucket | The material may be approaching or exceeding its usable pot life | I would record batch time and check whether retempering occurred |
| The wall adhesive develops a skin | The open time may have been exceeded | I would record spreading and tile-placement times |
| The adhesive bed is unusually deep | The tile may have more opportunity to settle | I would check substrate flatness and specified bed limits |
| Only large or heavy tiles move | Tile load, back profile, or system selection may be relevant | I would review tile data and installation requirements |
| Slipping occurs on dusty areas | Adhesion and bed stability may be affected by contamination | I would inspect substrate preparation |
| Slippage varies by crew | Mixing, troweling, timing, or support practices may differ | I would compare process records by crew |
This table does not provide a confirmed diagnosis. It creates a sequence for investigation. Product-specific limits still need to come from the current technical data sheet, the adhesive supplier, and the applicable installation standard.
How Should Batch Preparation Be Checked When Tile Adhesive Is Slipping?
Tile adhesive slipping often leads crews to alter the consistency by feel. Some installers reduce water because they want a “stronger” or thicker mix, while others add water because the adhesive feels difficult to spread. Both reactions can move the batch away from its designed working range.
I recommend checking preparation records before changing the product. The installer should compare the actual water dosage with the manufacturer’s instructions and then verify the complete mixing sequence. The check should include initial mixing, specified slaking, remixing, batch size, equipment, and any water added after mixing.
Measure Water Instead of Judging by Appearance
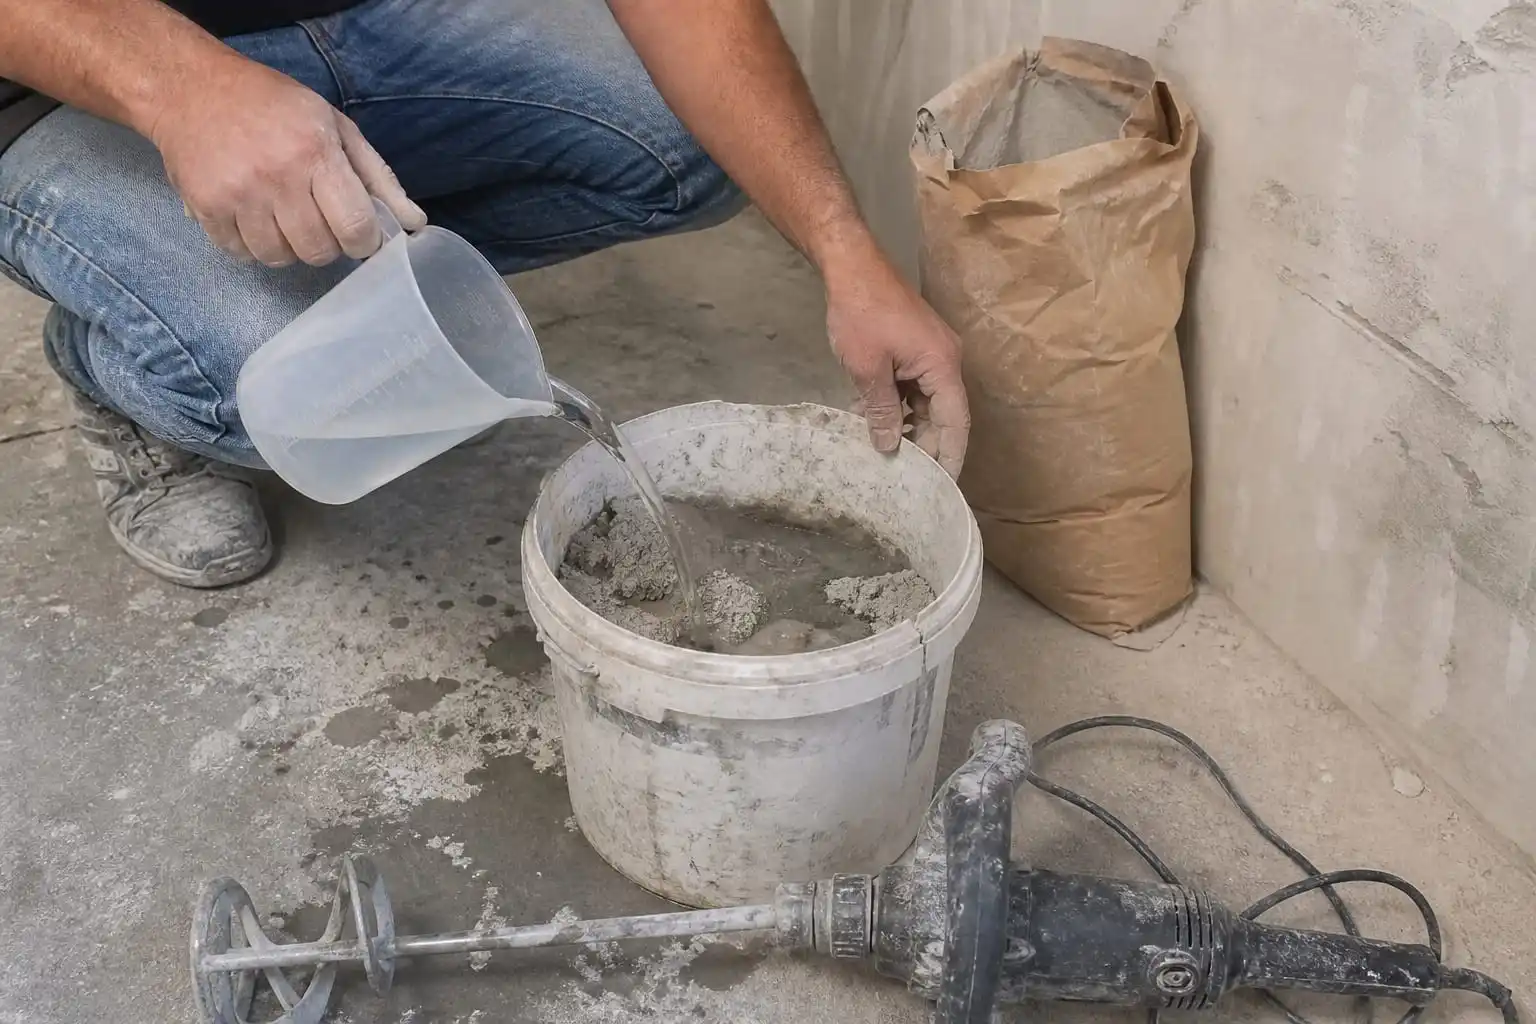
I often hear that an installer “used the normal amount” or “mixed until it looked right.” Those statements do not provide enough information for a useful investigation.
Different crews may describe the same consistency in different ways. Temperature, powder temperature, mixer type, batch size, and mixing energy can also affect what the wet mortar looks and feels like. For that reason, visual judgment should not replace a documented dosage.
I suggest recording:
- The installer should record the adhesive product name and batch number.
- The installer should record the powder mass used in each mix.
- The installer should measure the water volume or mass.
- The installer should note whether the water or powder entered the container first.
- The installer should record the mixer type and approximate mixing duration.
- The installer should record the slaking and remixing steps.
- The installer should document any later water addition.
I do not recommend publishing or applying a universal water ratio because formulations differ. The correct range must come from the current product documentation. Even products in the same broad category may use different binder systems, fillers, cellulose ether grades, and polymer levels.
Do Not Skip Slaking and Remixing
Many cement-based tile adhesives require a defined resting period after initial mixing, followed by remixing.4 That sequence allows important ingredients to hydrate and distribute through the mortar. However, the required process depends on the product.
If a crew applies the material immediately after an incomplete mix, the adhesive may not display its intended consistency or sag resistance. If a crew allows an uncontrolled rest far beyond the stated sequence, a different working-time issue may arise.
The diagnostic question should therefore be precise:
Did the crew follow the manufacturer’s complete preparation instructions, rather than only approximating the water dosage?
I recommend comparing one observed batch against the written process. A project manager can use a scale or graduated container, a clean timer, the normal mixer, and the same site water. That controlled comparison provides better evidence than making several unrecorded changes at once.
Thicker Is Not Automatically Better
A stiffer mix may appear to resist downward movement initially, but I would not treat reduced water as a universal remedy for tile adhesive slipping. An under-watered mix may become difficult to spread and may provide poor contact with the substrate or tile back. It may also fall outside the manufacturer’s validated instructions.
A useful batch check changes one variable at a time. If the crew changes water dosage, trowel size, bed depth, and tile-support method simultaneously, the crew loses the ability to identify which change affected the result.
How Do Pot Life and Open Time Affect Tile Adhesive Slipping?
Tile adhesive slipping can result from two timing problems that people often combine. Material can remain too long in the mixing bucket, or applied adhesive can remain exposed too long on the wall. These conditions involve different clocks, and each one requires separate records.
Pot life describes how long the mixed adhesive remains usable under stated conditions.5 Open time describes the period after spreading during which tiles can be installed with adequate wetting and bond development.6 Installers should verify both against current product documentation and should not restore aged material by adding water unless the manufacturer expressly permits it.
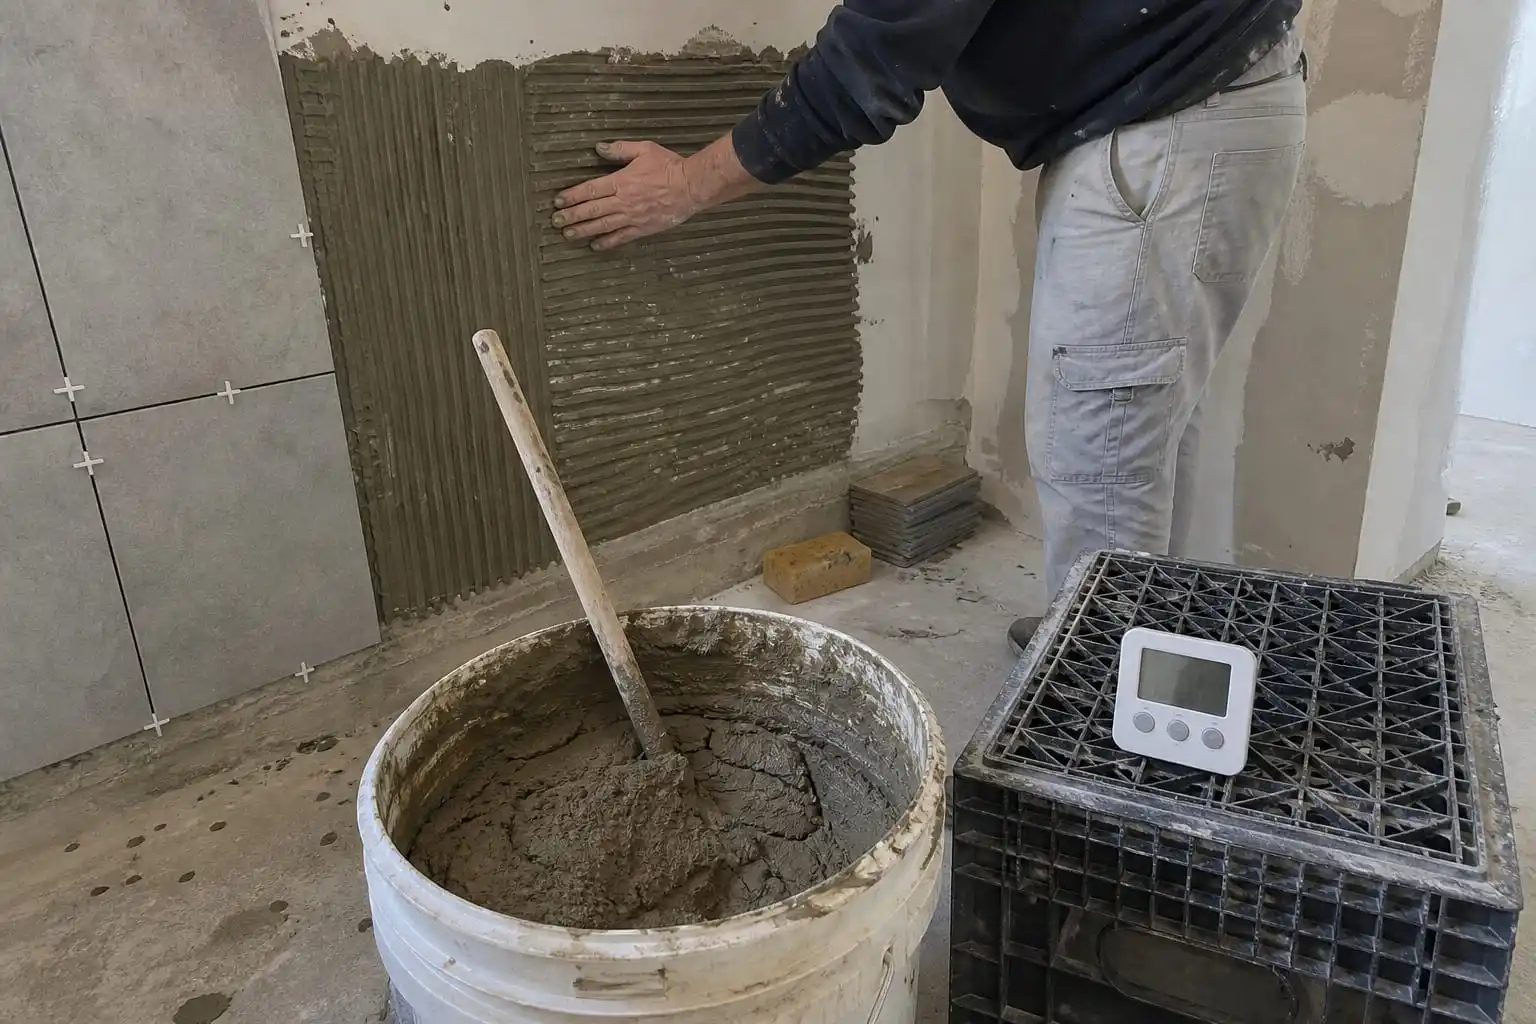
Pot Life Starts With the Mixed Batch
The pot-life clock concerns material in the bucket. A batch may gradually lose workability as hydration and other formulation processes continue. High temperature, direct sun, hot water, or a warm mixing container may alter site behavior compared with standard test conditions.
When material becomes stiff, some installers add water and mix again. This practice is commonly called retempering. Retempering may make the mortar feel workable, but improved spreadability does not prove that the original performance has been restored.
I recommend asking four separate questions:
- When did mixing begin?
- When did the crew place the first tile from that batch?
- When did the crew place the last tile from that batch?
- Did anyone add water or fresh adhesive to the aged mix?
The manufacturer’s instructions should determine whether remixing without water is allowed and when a batch must be discarded. A contractor should not assume that every dry-mix product follows the same rule.
Open Time Starts on the Wall
The open-time clock concerns adhesive after troweling. Once the mortar is spread, air movement, heat, direct sunlight, low humidity, and an absorptive substrate may accelerate surface drying.7
An exposed adhesive bed can develop a skin.8 A tile placed after skin formation may not wet into the ridges as intended. The installer may also push or adjust the tile repeatedly while trying to achieve contact and alignment. That sequence can complicate the observed slippage.
I suggest documenting both times directly:
| Timing record | What the installer records | Why the record matters |
|---|---|---|
| Bucket time | The installer records mixing and discard times | The record helps evaluate pot-life compliance |
| Spreading time | The installer records when a wall area was combed | The record starts the open-time check |
| Placement time | The installer records when each test tile was embedded | The record shows exposure duration |
| Adjustment time | The installer records later tile movement or repositioning | The record identifies delayed handling |
| Environmental condition | The installer records temperature, wind, sun, and surface warmth | The record provides context for actual site behavior |
I avoid quoting one universal number for either pot life or open time. A specific product may state different limits, and laboratory values may be based on controlled conditions. The current technical data sheet and site evaluation should guide decisions.
Smaller Working Areas Can Improve Control
If open-time exposure appears relevant, I would not immediately conclude that the adhesive needs replacement. The crew may need to spread a smaller area so that each tile is placed while the mortar remains in the specified condition.
The crew can also check the adhesive surface before tile placement using the method recommended by the product supplier or applicable installation guidance. However, the crew should not use an informal finger test as the only proof of system suitability. A qualified technical professional should assess application-specific uncertainty.
Which Substrate and Tile Factors Can Cause Tile Adhesive Slipping?
Tile adhesive slipping may continue even when batch preparation is correct. A dusty, highly absorptive, uneven, weak, or incompatible wall can affect application. Tile dimensions, mass, back profile, contamination, and surface condition can also change how the freshly installed system behaves.
I recommend evaluating the wall and tile as part of the same system. The investigation should cover substrate soundness and flatness, surface cleanliness, absorption, tile size and weight, tile-back condition, trowel selection, contact, adhesive depth, joint control, and any required temporary support.
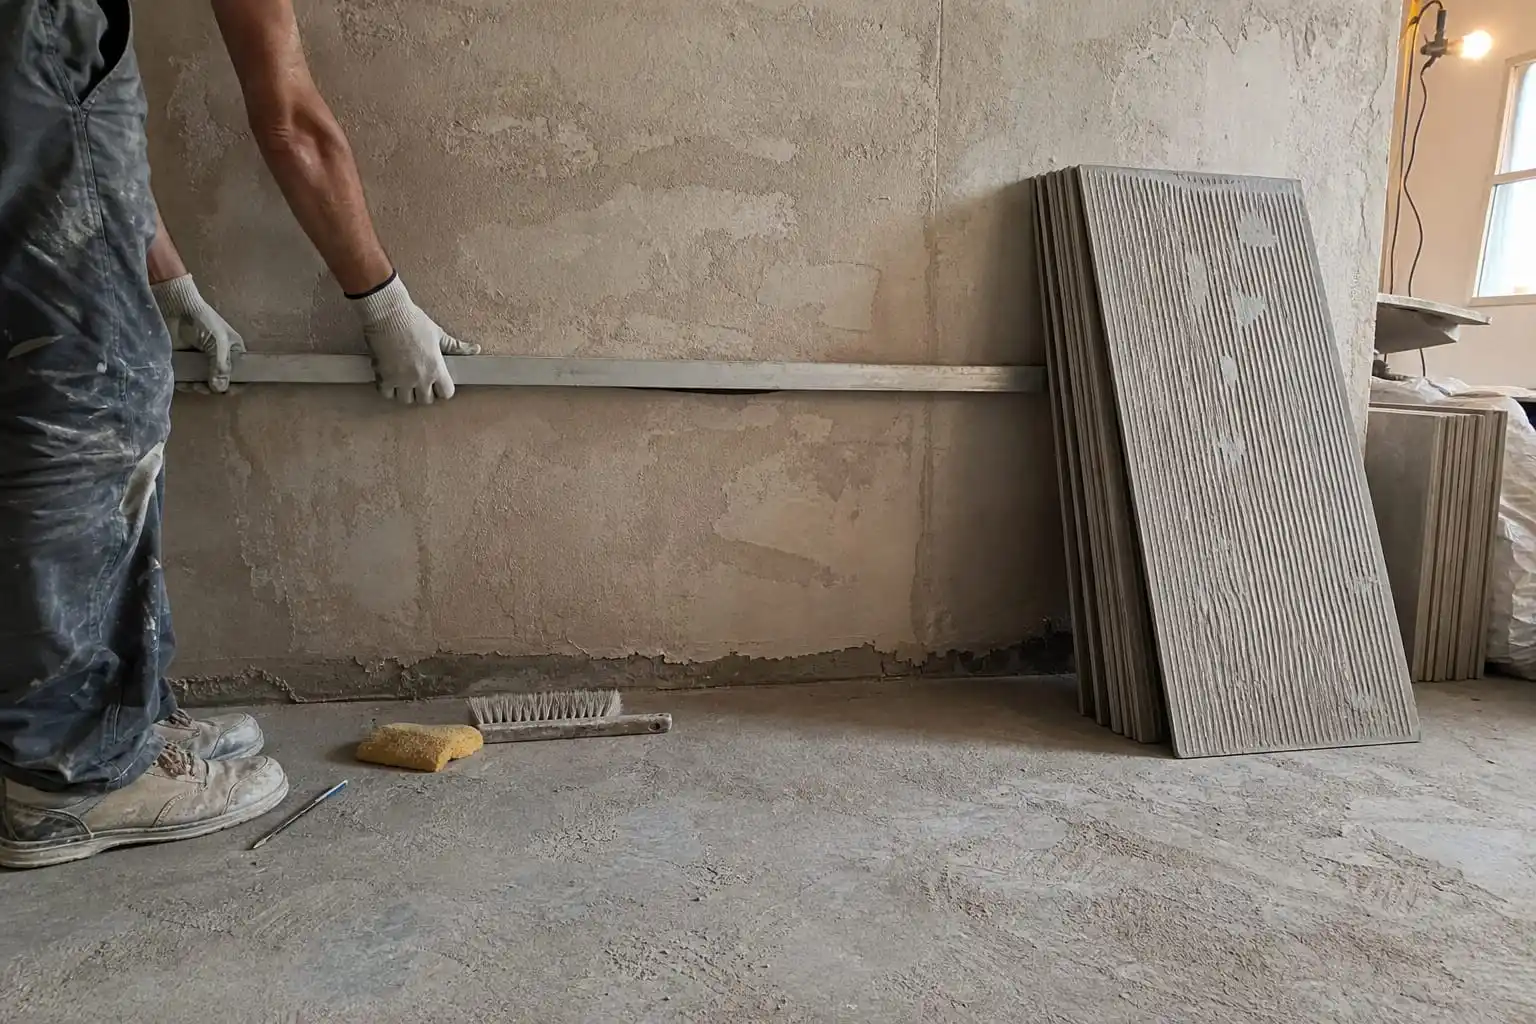
Substrate Flatness Affects Bed Depth
An uneven wall often leads the installer to compensate with extra adhesive.9 That practice can produce a bed much deeper than the adhesive or installation method allows. The increased depth may let a heavy tile settle before the mortar develops sufficient resistance.
I recommend checking the substrate with the measurement method required by the project specification or local standard. The contractor should correct unacceptable irregularities with an appropriate leveling system rather than assuming that tile adhesive can compensate for every deviation.
The substrate inspection should include:
- The inspector should check whether the surface is structurally sound.
- The inspector should remove dust, loose material, oil, and other contaminants.
- The inspector should identify coatings, curing compounds, sealers, or residues.
- The inspector should evaluate whether the surface is unusually absorptive.
- The inspector should verify whether a primer or other preparation is specified.
- The inspector should check wall flatness before selecting the adhesive-bed approach.
I would seek qualified evaluation if the substrate is weak, moisture-sensitive, painted, deformable, or otherwise outside common cementitious backgrounds. A product supplier cannot confirm compatibility from a photograph alone.
Tile Characteristics Change the Load
A small, light ceramic tile does not impose the same fresh-bed load as a large and heavy unit.10 A pronounced tile-back profile may also affect the required application technique and contact.
I ask the contractor to record:
- The contractor should record the tile length, width, thickness, and weight.
- The contractor should identify the tile material and absorption category.
- The contractor should photograph the tile back.
- The contractor should note dust, release powder, moisture, or contamination.
- The contractor should identify any manufacturer-specific installation requirement.
- The contractor should confirm whether mechanical restraint or temporary support is required.
These details help separate a general mixing complaint from a system-selection issue. If only one tile format slips while lighter tiles remain stable under the same controlled process, tile load and application design deserve closer review. That pattern still does not prove that either the tile or adhesive is defective.
Trowel Technique and Bed Thickness Matter
The trowel controls mortar distribution, but trowel selection should match the tile, substrate, adhesive, and project requirements. A larger notch is not automatically a better fix for tile adhesive slipping.
The installer should hold the trowel consistently and comb the mortar in a controlled direction according to applicable installation guidance. The installer should then embed the tile using the specified movement and pressure. Where required, the installer should apply adhesive to the tile back as well.
A contractor can periodically remove a newly placed test tile to inspect contact. The contractor should compare the observed result with the project standard rather than relying on a vague impression that coverage “looks enough.”
Spacers Are Not Always Structural Supports
Spacers help control joint width, but ordinary spacers may not be designed to carry substantial vertical load.11 Tile leveling devices also serve a particular alignment function and should not automatically be treated as substitutes for required supports.
Heavy tiles, low starting courses, and specific wall arrangements may require battens, wedges, rails, or another approved temporary-support method. A qualified installer or system designer should determine that need. I would never present support as a way to conceal an unsuitable adhesive or incorrect process; support must form part of a compatible installation plan.
How Should You Respond When Tile Adhesive Slipping Starts?
Tile adhesive slipping becomes more expensive when a crew continues covering a wall while the cause remains unknown. More tiles can move, joints can become uneven, and later corrections can disturb the fresh bed. The resulting dispute may then involve the installer, contractor, client, distributor, and manufacturer.
I recommend pausing broader installation in the affected area, securing any immediate safety risk, and preserving evidence. The project team should document the product, batch, preparation, timing, substrate, tiles, tools, conditions, and movement before changing materials or methods.
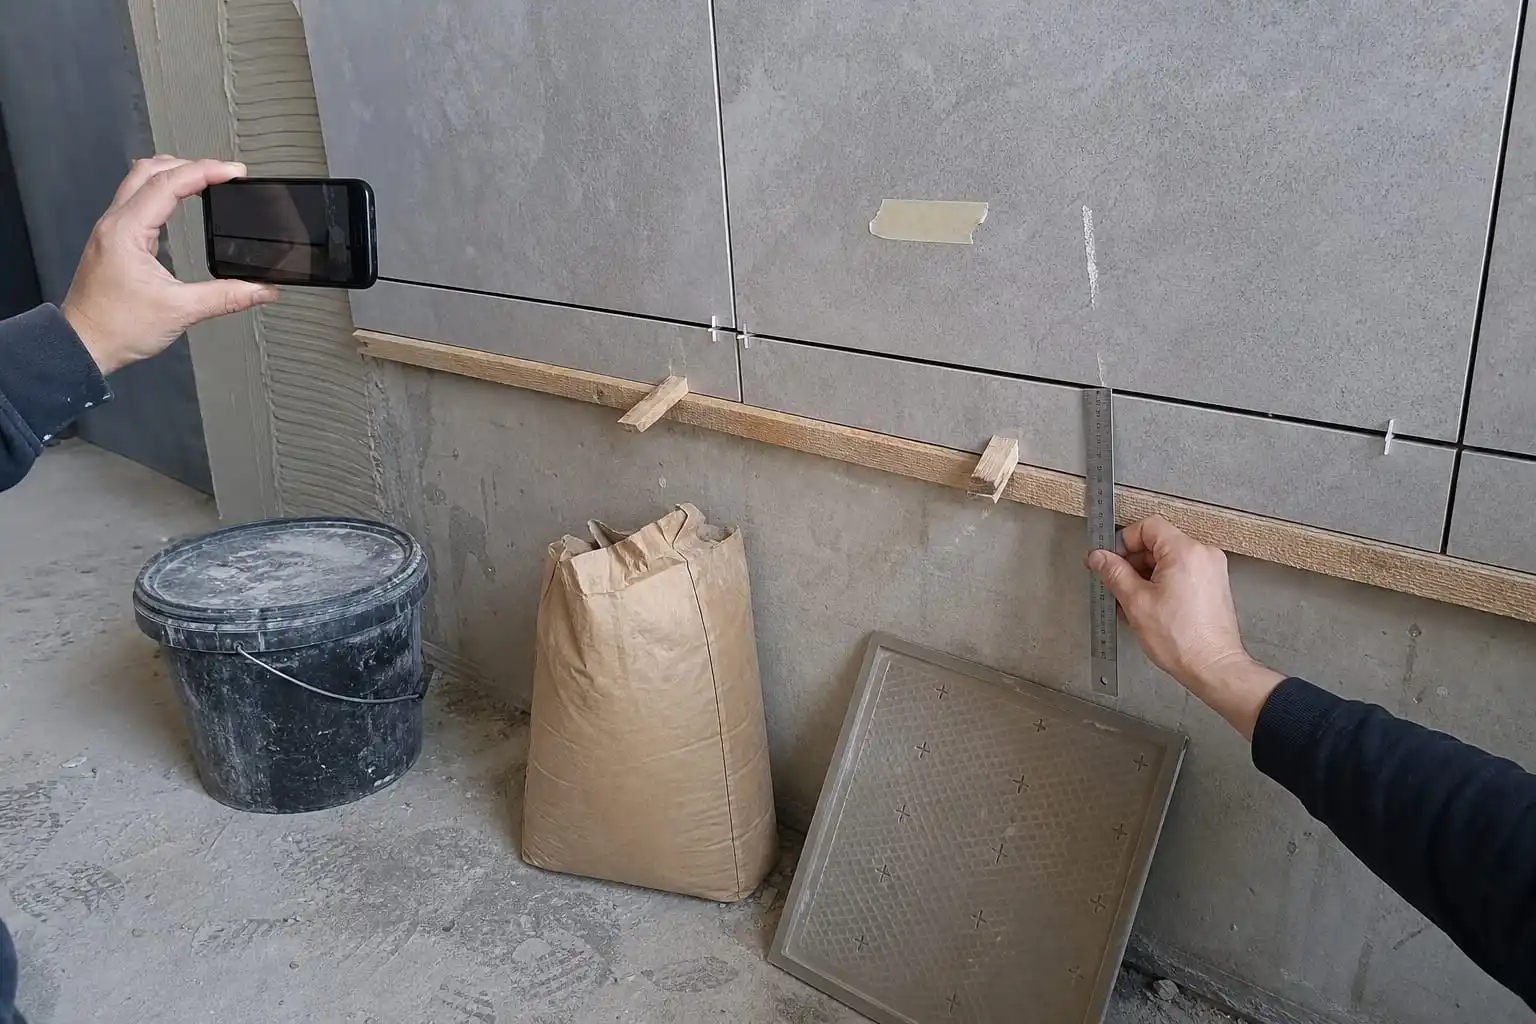
Use a Controlled Stop-Work Process
The first response should protect people and prevent the symptom from spreading. Large wall tiles can present a safety risk if they are unstable.12 The responsible site professional should determine whether tiles need temporary restraint or removal.
I suggest the following sequence:
- The crew should stop extending the affected installation.
- The site supervisor should isolate any unsafe area.
- The team should mark the affected tiles and record the time.
- The team should photograph overall alignment and close-up movement.
- The team should preserve unopened bags and a sample of the relevant batch where practical.
- The team should record the bag codes, production details, and delivery information.
- The installer should document water dosage and preparation steps.
- The supervisor should record bucket time and wall exposure time.
- The team should inspect the substrate, tile backs, trowel, and bed depth.
- The team should contact the adhesive supplier with the complete record.
The team should avoid running uncontrolled experiments across the wall. A random switch to a different water ratio or product can erase evidence and introduce new variables.
Preserve a Useful Evidence Package
A supplier can respond more effectively when the claim contains traceable information. A statement such as “your adhesive slips” gives the technical team very little to evaluate.
A stronger evidence package includes:
| Evidence | Useful detail |
|---|---|
| Product identification | The record includes the full product name, grade, batch code, and bag photos |
| Preparation | The record includes powder and water quantities, mixer type, slaking, and remixing |
| Timing | The record includes mixing, spreading, placement, and adjustment times |
| Substrate | The record includes material, age, preparation, flatness, and surface condition |
| Tile | The record includes format, mass, material, back profile, and photos |
| Application | The record includes trowel notch, bed depth, working area, and support method |
| Environment | The record includes temperature, wind, sun exposure, and surface conditions |
| Symptom | The record includes movement distance, timing, location, and frequency |
Even a simple ruler included in sequential photographs can help show the direction and amount of movement. The project team should preserve original files and timestamps rather than relying only on edited messaging-app images.
Test One Corrected Variable at a Time
After the initial review, the project team may run a limited and controlled trial. The team should agree on the test plan before work resumes. The plan should follow the product data sheet and applicable project requirements.
For example, the team might compare a documented batch prepared exactly as instructed against the previous undocumented process. The team should keep the substrate, tile, trowel, support method, and environmental exposure as consistent as possible. If several variables must change for safety or compliance, the report should state that limitation.
I recommend that a qualified installation professional assess important projects, unusual tiles, or uncertain substrates. Written guidance can organize the investigation, but it cannot replace an on-site evaluation.
When Does Tile Adhesive Slipping Justify a Supplier Claim?
Tile adhesive slipping may justify a supplier investigation, but the visible symptom alone does not establish manufacturing nonconformity. A claim becomes more meaningful when the project team can show that storage, preparation, timing, substrate, application, and tile-system requirements were followed and that a traceable batch still performed outside documented specifications.
I recommend opening a documented supplier claim when controlled process checks do not explain the movement or when batch records indicate a possible inconsistency. The buyer should request batch traceability, relevant test reports, retained-sample review where available, and a technical response tied to the product’s declared requirements.
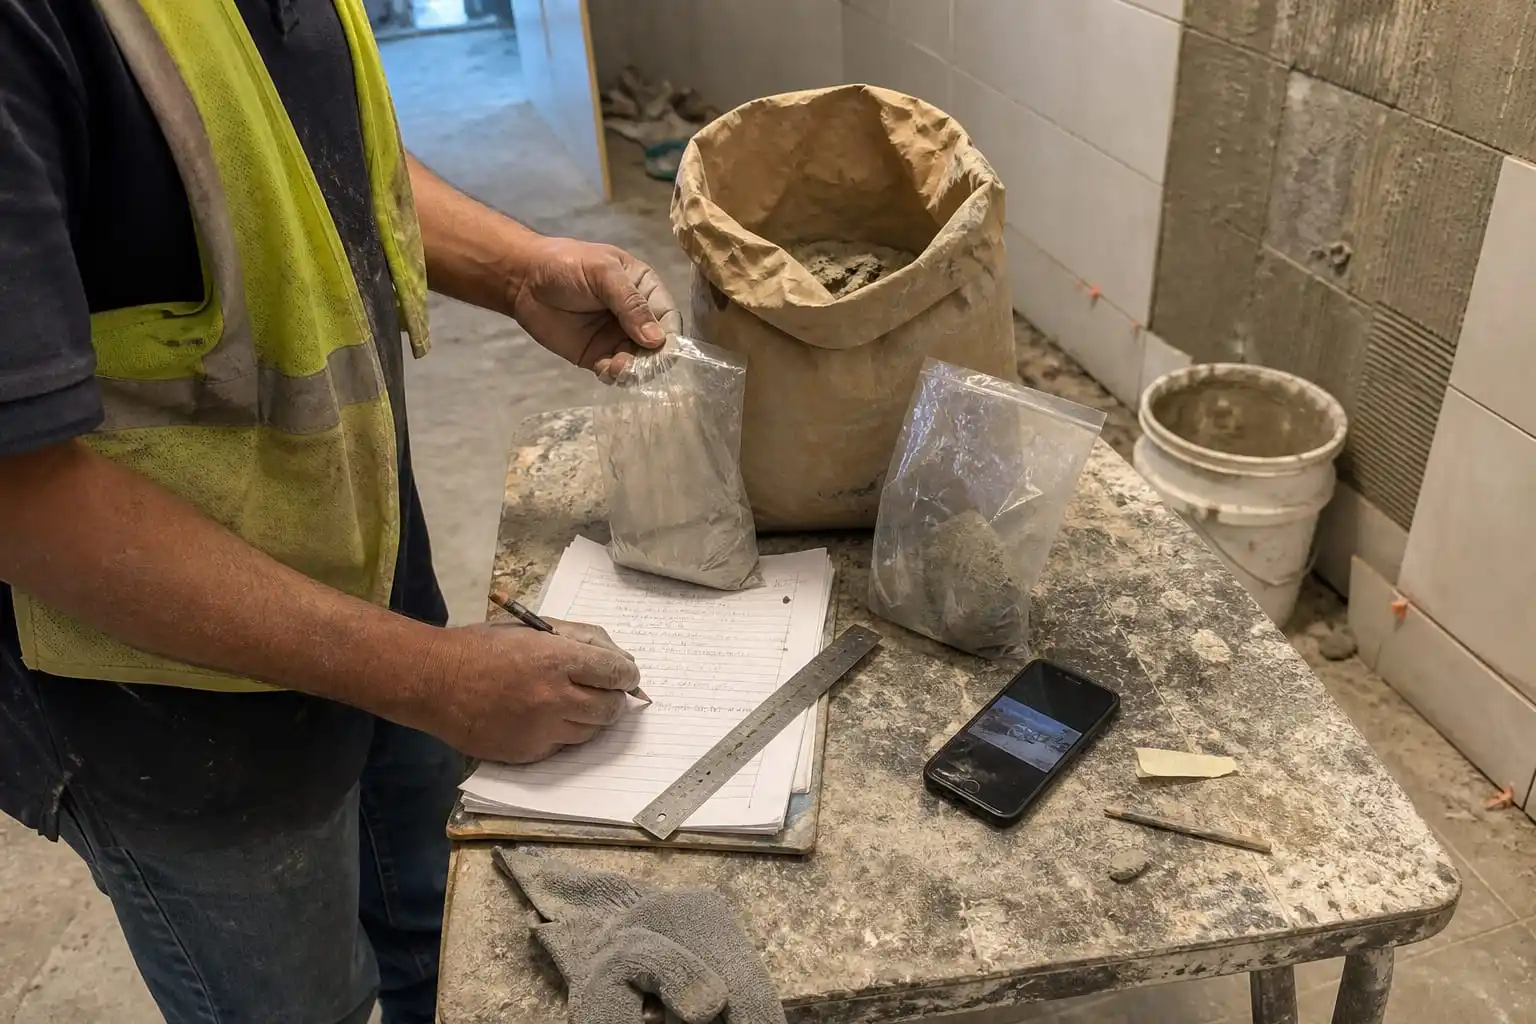
Separate Product Verification From Site Diagnosis
A manufacturer can test properties associated with a batch, but those tests do not reconstruct every site condition. Likewise, a site photo cannot verify every manufacturing property.
At Shijiazhuang Jinghong Chemical Technology Co., Ltd., we manufacture cellulose ethers and dry-mix mortar additives rather than diagnosing completed tile installations from a distance. Our laboratory tests each additive batch for specified properties such as viscosity, water retention, moisture, and ash content. We provide those controls to support consistency, but a dry-mix adhesive producer must still validate its complete formulation and finished product.
For construction-grade HPMC, we manufacture grades with reported water retention above 95% under the applicable test conditions. Buyers should verify the exact method, specification, sample, and current technical document before using that figure in procurement decisions. A raw-material result does not by itself prove the field performance of a finished tile adhesive.
Ask Suppliers for Verifiable Documents
A B2B buyer evaluating a suspected batch issue can request:
- The buyer should request a certificate of analysis for the supplied batch.
- The buyer should compare the certificate with the agreed purchase specification.
- The buyer should ask which test methods and conditions were used.
- The buyer should verify whether the supplier retains reference samples.
- The buyer should request the current technical and safety data sheets.
- The buyer should check storage limits, packaging condition, and shelf-life records.
- The buyer should verify any certification directly with its issuer when relevant.
- The buyer should ask for a written technical response to the documented complaint.
Certifications and reports should be treated as documents to verify, not as automatic proof that every site outcome will be successful. Finished adhesive performance depends on formulation design, raw-material compatibility, manufacturing control, storage, and installation.
Use a Controlled Sample Process Before Bulk Changes
When a tile adhesive manufacturer suspects that a cellulose ether or polymer powder affects anti-slip behavior, I recommend a controlled formulation review rather than an immediate bulk substitution. The producer should hold other raw materials and process variables stable where possible.
Our team can provide free HPMC, HEMC/MHEC, HEC, or RDP samples for formulation trials. We can also recommend viscosity grades based on the buyer’s stated formulation, substrate, and climate. However, the finished-product manufacturer remains responsible for validating the complete adhesive against the intended standard and application.
A laboratory or pilot evaluation should examine the relevant finished-mortar performance instead of relying only on cellulose ether viscosity. A qualified formulator should review binder chemistry, aggregate grading, polymer content, water demand, rheology, and application requirements before approving a change.
Frequently Asked Questions
Does tile adhesive slipping prove that the adhesive is defective?
No. Tile adhesive slipping shows that a fresh tile lacks enough resistance to remain in position, but it does not identify why. Excess water, incorrect mixing, expired working time, substrate conditions, tile weight, bed thickness, trowel use, and inadequate support can all contribute. A documented system diagnosis should come before a defect conclusion.
Should I reduce the water if wall tiles start slipping?
I would not reduce water automatically. The installer should first compare the actual measured dosage with the product’s current instructions. An under-watered mix may become stiffer but may also spread or wet surfaces poorly. The project team should correct documented deviations rather than adjusting consistency by feel.
Can I add water when tile adhesive becomes stiff in the bucket?
I recommend following the manufacturer’s written instructions. Adding water to aged material may improve apparent workability without restoring its intended performance. The installer should record the batch time and determine whether the adhesive remains within its stated pot life. The installer should discard material when the product instructions require it.
What is the difference between pot life and open time?
Pot life concerns how long mixed adhesive remains usable in the bucket under stated conditions. Open time concerns how long adhesive can remain exposed after application before a tile must be placed. A batch can remain within pot life while an area spread on the wall has already exceeded its usable open time.
When should I contact the adhesive or additive supplier?
I recommend contacting the supplier after the project team has stopped affected work and collected the product code, batch number, water dosage, mixing sequence, timing records, substrate details, tile information, application method, environmental conditions, and photographs. Complete evidence allows the supplier to assess batch records and process variables more effectively.
Conclusion
Tile adhesive slipping on vertical walls requires diagnosis rather than immediate blame. I recommend checking measured water dosage, mixing, slaking, remixing, pot life, open time, substrate preparation, tile characteristics, trowel use, bed thickness, and temporary support before replacing the product. The project team should pause affected work and preserve traceable records if movement appears.
If you manufacture tile adhesive and need to evaluate HPMC, HEMC/MHEC, or RDP options for controlled formulation trials, contact us at hpmc@jinghonghpmc.com or WhatsApp +86 157 3315 6958 to request a free sample, technical grade recommendation, or factory-direct quotation.
"Tile Adhesive Classification BS EN 12004 - Squote", https://squote.app/knowledge/cross-reference/tile-adhesive-guide. Tile-adhesive standards characterize slip as the vertical displacement of a tile on a vertical substrate before the adhesive has set, providing a standardized basis for describing early downward movement. Evidence role: definition; source type: institution. Supports: The relevant tile-adhesive standard defines slip as vertical displacement of a tile applied to a vertical test surface before the adhesive has set.. ↩
"Tile Installation Process: What to Expect from Start to Finish", https://www.leicesterflooringandcarpet.com/professional-tile-installation-in-asheville/tile-installation-process/. Technical tile-installation guidance identifies substrate condition, mixing, application method, coverage, and environmental exposure as variables that can affect performance; consequently, slippage by itself does not isolate a manufacturing defect. Evidence role: general_support; source type: institution. Supports: Tile-installation guidance identifies substrate preparation, material mixing, coverage, environmental conditions, and installation practice as factors affecting adhesive performance.. Scope note: This support establishes that multiple site variables are relevant, not that any particular adhesive batch is conforming. ↩
"When installing on vertical substrates, the tile adhesive ...", https://www.facebook.com/BuildriteConstructionChemicals/posts/when-installing-on-vertical-substrates-the-tile-adhesive-should-be-non-sag-and-s/2587015991434181/. Research on fresh cementitious mortars and tile-adhesive specifications indicates that deformation under load depends on rheology and layer geometry; a thicker fresh bed can therefore provide greater scope for settlement before sufficient resistance develops. Evidence role: mechanism; source type: research. Supports: Fresh cementitious mortar can deform under load, and tile-adhesive systems specify application thicknesses and deformation-related performance limits.. Scope note: The magnitude of movement depends on the specific adhesive rheology, tile load, substrate geometry, and installation method. ↩
"How to mix adhesive for tile installation: the expert's recipe", https://www.rubi.com/en/blog/how-to-mix-adhesive-for-tile-installation/. Cement-based mortar guidance commonly specifies initial mixing, a short slaking period, and remixing before application so that the product reaches its intended working consistency. Evidence role: general_support; source type: education. Supports: Technical instructions for cement-based mortar products commonly prescribe mixing, a rest period, and remixing to obtain the intended consistency.. Scope note: Required slaking duration and whether remixing is permitted are product-specific and must be taken from the current manufacturer instructions. ↩
"ISO 13007-1:2014 - Ceramic Tile Adhesives Terms ...", https://standards.iteh.ai/catalog/standards/iso/8fccef32-bf22-4458-88ed-34f1d47485ab/iso-13007-1-2014?srsltid=AfmBOop1A0TcDSEkSv1luH6QuGWHAYhgwKGl-6UoXOwliF7NN3pIBTsN. In tile-adhesive terminology, pot life denotes the time during which a prepared adhesive remains usable under the specified test or application conditions. Evidence role: definition; source type: institution. Supports: Standards for ceramic tile adhesives define pot life as the period during which a mixed adhesive remains usable under stated conditions.. ↩
"Assessment of Cementitious Ceramic Tile Adhesives in ... - PMC", https://pmc.ncbi.nlm.nih.gov/articles/PMC10301792/. Tile-adhesive standards define open time as the interval after spreading during which tiles can still be embedded to achieve the specified adhesion performance. Evidence role: definition; source type: institution. Supports: Tile-adhesive standards define open time through the ability to achieve specified adhesion after a defined period following adhesive application.. Scope note: Standardized open-time results are obtained under controlled conditions and may not predict site exposure without considering temperature, airflow, substrate absorption, and sunlight. ↩
"The Effect of Harsh Environmental Conditions on Concrete ...", https://pmc.ncbi.nlm.nih.gov/articles/PMC9740496/. Studies of fresh cementitious materials show that evaporation is influenced by temperature, airflow, and relative humidity, while absorptive substrates can remove water from the applied material; these factors can shorten the workable surface condition of spread mortar. Evidence role: mechanism; source type: paper. Supports: Evaporation from fresh cementitious materials increases with temperature and airflow and is affected by relative humidity and moisture uptake by the substrate.. Scope note: The direct effect on a particular adhesive's open time must be determined using that product's instructions and relevant site conditions. ↩
"Redispersible polymer powder modified cementitious tile ...", https://pmc.ncbi.nlm.nih.gov/articles/PMC8606344/. Tile-installation guidance notes that adhesive left exposed beyond its effective open time can form a surface skin, reducing effective transfer and contact when a tile is subsequently embedded. Evidence role: mechanism; source type: institution. Supports: Tile-installation guidance warns that adhesive exposed beyond its effective open time may form a dry surface skin and impair transfer to the tile.. Scope note: Surface appearance alone is not a validated measure of bond performance; the applicable product instructions and installation standard govern assessment. ↩
"Don't Patch Your Tile Substrate With Thin Set", https://www.ceramictilefoundation.org/blog/is-it-patch-or-thin-set. Tile-installation standards distinguish substrate preparation and leveling from normal adhesive application, reflecting that significant wall irregularities should be corrected rather than routinely compensated for with excessive thin-bed mortar. Evidence role: general_support; source type: institution. Supports: Tile-installation guidance sets substrate-flatness requirements and distinguishes surface preparation or leveling from ordinary thin-bed adhesive application.. Scope note: Permissible deviations and corrective methods depend on the selected installation system, tile format, and applicable project specification. ↩
"Installing Large Format Wall Tile (Pro Results)", https://rogueengineer.com/installing-large-format-wall-tile/. Large-format tile installation guidance recognizes that increased tile dimensions and mass place greater demands on substrate preparation, mortar contact, handling, and, where required, temporary support during wall installation. Evidence role: mechanism; source type: institution. Supports: Large-format tile installation guidance addresses increased unit size and weight through substrate, coverage, handling, and support considerations.. Scope note: Tile mass is only one design variable; adhesive classification, bed geometry, tile-back profile, and support details also affect performance. ↩
"Tile Spacers Guide: Achieve Perfect Tile and Stone ...", https://www.ardexendura.com/blogs/tile-and-stone-installations/tile-spacers-explained-the-secret-to-impeccably-aligned-tiles-and-stone-surfaces/. Tile-installation guidance distinguishes joint-spacing accessories from temporary restraint methods, indicating that spacers maintain joint geometry but should not be assumed to provide the load-bearing support required for heavy or unstable wall tiles. Evidence role: general_support; source type: institution. Supports: Installation guidance differentiates devices used to maintain joint spacing from temporary support methods used to restrain wall tiles during installation.. Scope note: Whether a particular accessory can bear load depends on its documented design, the tile system, and the installation instructions. ↩
"Fall Protection - Overview | Occupational Safety and Health ...", http://www.osha.gov/fall-protection. Construction-safety guidance identifies falling materials as a workplace hazard and supports controlling access and securing or removing unstable items; unstable wall tiles therefore warrant prompt site-specific safety assessment. Evidence role: general_support; source type: government. Supports: Construction-safety authorities identify falling or unstable materials as hazards requiring risk control, exclusion of exposed persons, and suitable securing measures.. Scope note: The required control measures must be determined by the responsible site professional according to the tile condition, location, and applicable safety rules. ↩